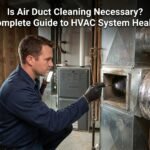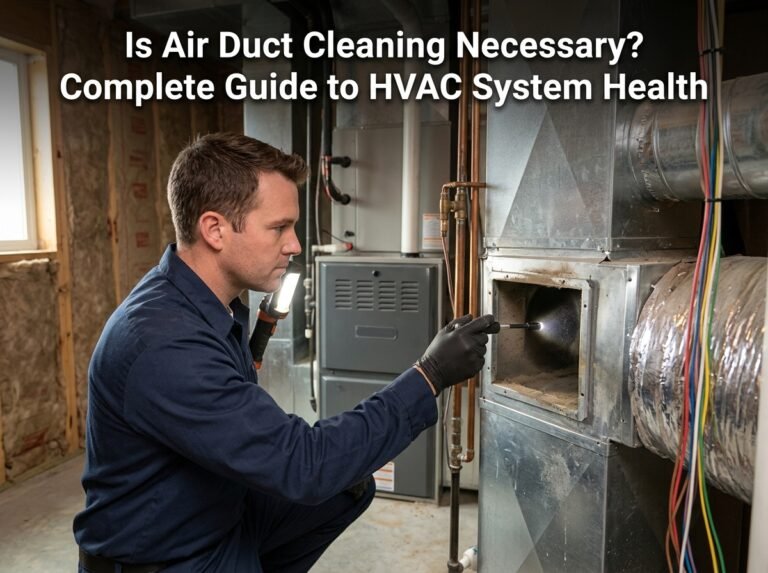
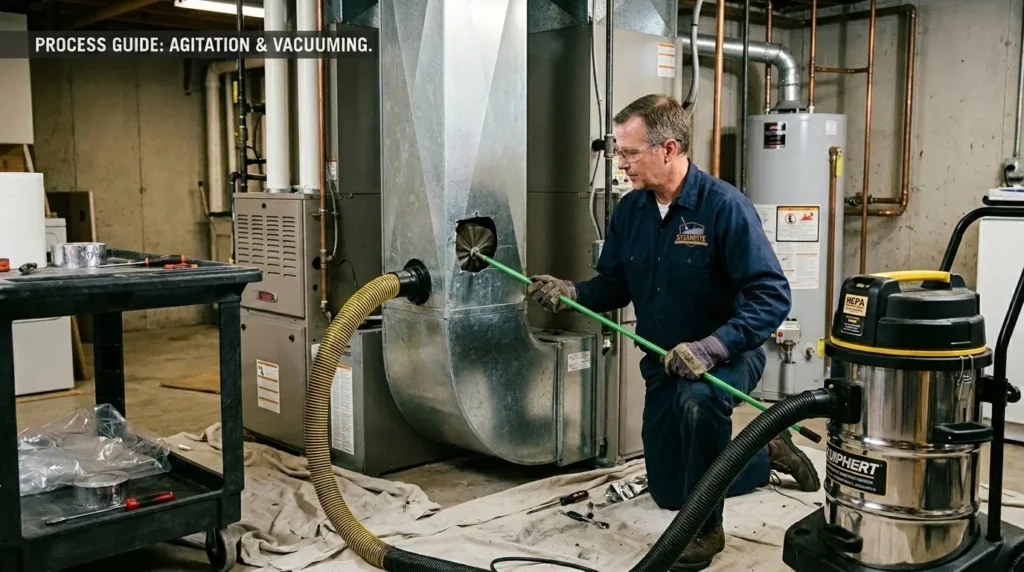
The air duct cleaning process starts with an inspection of the HVAC system. Technicians identify supply and return ducts, registers, grilles, access points, and other components included in the job. Vacuum equipment is then connected to create controlled negative pressure. Specialized agitation tools loosen dust and debris from duct surfaces while the vacuum system collects the material. Accessible system components and registers are cleaned as required, any service openings are properly closed, and the system receives a final inspection.
That is the basic answer to how air duct cleaning works. A complete job is more than vacuuming visible dust from vent openings.
Professional HVAC cleaning treats the duct system as connected parts. The EPA describes duct cleaning as cleaning components that can include supply and return ducts, registers, grilles, diffusers, coils, drain pans, fan components, and the air-handler housing.
What Happens During Professional Air Duct Cleaning?
The exact setup can change with the HVAC system, duct material, access, and condition, but the core air duct cleaning steps follow a logical order.
- Inspect the HVAC system and define the cleaning area.
- Protect the home and prepare system access.
- Open or create suitable access points where needed.
- Connect vacuum collection equipment and establish negative pressure.
- Loosen debris with suitable agitation tools.
- Collect loosened material through the vacuum system.
- Clean accessible registers, grilles, ducts, and included HVAC components.
- Close access openings and inspect the completed work.
NADCA describes two central parts of HVAC cleaning: loosening contaminants from system surfaces and collecting those contaminants. Its current guidance also describes continuous negative pressure as part of the collection process.
The following sections explain what each stage means inside a home.
Step 1: Inspecting the HVAC System Before Cleaning
A professional job should begin with a system inspection.
The technician needs to understand what is being cleaned before equipment is connected. Homes can contain different duct materials, layouts, furnace or air-handler configurations, and access conditions.
The inspection may identify supply ductwork, return ductwork, registers, grilles, trunk lines, accessible air-handler components, and existing service openings.
The technician may also look for damaged duct sections or materials that require special handling.
EPA guidance specifically states that a service provider should inspect the system before cleaning, including checking for asbestos-containing materials that should not be disturbed by ordinary duct-cleaning procedures.
This first stage also helps define the actual scope of work. Cleaning visible registers alone is different from accessing and cleaning the connected duct system.
Step 2: Preparing the Home and HVAC System
Once the system has been inspected, the work area needs to be prepared.
Technicians need safe access to registers, return grilles, HVAC equipment, and any duct locations required for the job. Furniture or household items that block those areas may need to be moved out of the immediate work zone.
Flooring and nearby furnishings should also be protected where cleaning equipment, hoses, or tools will pass.
EPA guidance specifically calls for protecting carpet and household furnishings during duct cleaning.
Homeowners can make this stage easier by keeping the areas around registers and the HVAC unit accessible.
Pets should also be kept away from work areas so doors, hoses, tools, and open registers can be handled safely.
Preparation is not the cleaning itself, but it allows the rest of the professional duct cleaning process to be completed without unnecessary obstacles.
Step 3: Accessing Supply and Return Ductwork
A technician must be able to reach the areas that need cleaning.
Some duct interiors can be accessed through existing openings, including supply registers, return grilles, duct end caps, and service openings.
Other systems may require additional access points so cleaning equipment can reach sections that cannot be properly addressed from a room register.
NADCA notes that technicians may sometimes need to create service openings in ductwork to gain proper access. Those openings must then be closed correctly after the work is complete.
Access is important because duct systems can contain long trunk lines and branches that extend well beyond what can be seen from a vent.
Simply placing a household vacuum hose into a register does not provide the same access to the full system.
Step 4: Establishing Negative Pressure
Negative pressure is one of the most important parts of understanding what happens during air duct cleaning.
In a source-removal cleaning process, vacuum equipment is connected to the HVAC system so air and loosened material are drawn toward the collection equipment.
NADCA describes professional HVAC cleaning as placing the system under continuous negative pressure during cleaning. This helps control particles after agitation loosens them from duct surfaces and directs the loosened debris toward the collection system.
Think of negative pressure as controlled suction within the section being cleaned.
Without proper collection, loosening dust inside ductwork could allow material to move into unwanted areas.
The vacuum equipment and the agitation tools therefore perform different jobs. One loosens debris. The other collects it.
Steamrite states that its professional air duct cleaning in Aurora, CO uses professional-grade vacuum extraction equipment and specialized brushing tools for duct-system cleaning.
Step 5: Loosening Dust and Debris From Duct Surfaces
Vacuum pressure alone may not remove material that is attached to the inside surfaces of ductwork.
This is where agitation comes in.
Agitation means physically loosening debris so the collection system can remove it. NADCA lists tools such as brushes, air whips, compressed-air nozzles, hand brushing, and contact vacuuming as examples of agitation methods used in HVAC cleaning.
The tool used should fit the duct material and condition.
Sheet-metal duct, flexible duct, and fiberglass-lined material should not automatically be treated in exactly the same way. EPA guidance notes that softer brushing methods are appropriate for fiberglass duct board and internally lined fiberglass ducts.
The goal is to loosen removable contamination without damaging the duct system.
Step 6: Collecting the Loosened Material
As debris is loosened, the vacuum collection system removes it from the ductwork.
This is the source-removal part of the process.
Dust and debris that were attached to the duct surface become easier to collect once agitation breaks them loose. Negative pressure helps draw that material toward the vacuum system rather than allowing it to remain inside the duct.
EPA says professional duct-cleaning methods typically use specialized tools to loosen dirt and other debris, followed by high-powered vacuum equipment to remove it.
The technician may work through different duct sections rather than trying to clean the entire system from one room opening.
Supply branches, return sections, and main trunk lines may require separate access depending on the design of the HVAC system.
This is why system layout is part of the initial inspection.
Step 7: Cleaning Registers and Grilles
Registers and grilles are the visible parts of the air-distribution system, but they are only one part of the job.
Supply registers deliver conditioned air into rooms. Return grilles allow air to move back toward the HVAC equipment.
These parts can collect visible dust around their surfaces and edges.
During a complete cleaning process, accessible registers and grilles can be removed or cleaned so they do not immediately return loose debris to cleaned duct sections.
The EPA includes registers, grilles, and diffusers among the components that can form part of HVAC-system cleaning.
Cleaning only these visible covers should not be confused with cleaning the duct system behind them.
A professional process considers both the openings in the room and the connected air passages.
Step 8: Addressing Included HVAC Components
The term “air duct cleaning” can make the job sound as though only sheet-metal tubes are involved.
An HVAC system contains more than ducts.
Depending on the agreed scope and system design, cleaning may involve accessible components such as the air-handler housing, blower area, coils, drain pan, plenums, registers, and other parts connected to the air path.
EPA and NADCA both describe HVAC cleaning as broader than cleaning only duct runs. NADCA specifically lists components including air ducts, coils, drain pans, registers, grilles, plenums, blower assemblies, heat exchangers, filters, and air cleaners when discussing whole-system cleaning.
Not every component requires the same tool or cleaning technique.
The inspection and agreed service scope determine which accessible components are included and how they are handled.
Step 9: Protecting Ductwork During Cleaning
Cleaning should remove debris without damaging the system.
Duct material affects how technicians approach agitation and access. Metal ducts are different from flexible duct and fiberglass-lined sections.
Tools must therefore be controlled rather than forced through the system.
Any access openings created for the work also need to be properly closed afterward.
EPA guidance says ductwork should be protected during cleaning and that access holes created or used during the service should be sealed and re-insulated as needed so they remain airtight.
This part of the process is easy for a homeowner to overlook because the access point may be away from a room register.
A completed job should leave the HVAC system properly closed, not with temporary holes or loose access panels.
Step 10: Completing the Post-Cleaning Inspection
The air duct cleaning process should end with a check of the areas that were cleaned and accessed.
EPA describes visual inspection as an important way to verify the cleanliness of the heating and cooling system after duct cleaning.
A final check can include reviewing accessible duct sections, registers, grilles, service openings, and included HVAC components.
The technician should also make sure that access panels or newly created openings have been properly closed.
If photos or inspection equipment were used to document conditions before cleaning, those same areas may be checked again after the work is complete.
This final stage confirms that the job has moved from cleaning to completion rather than ending as soon as the vacuum equipment is turned off.
What Should Homeowners Do Before Air Duct Cleaning Starts?
Home preparation is usually simple.
Keep clear access to registers, return grilles, the furnace or air handler, and other HVAC areas involved in the work. Move small objects that block those locations and keep pets away from the cleaning area.
If there are parts of the home that technicians will need to enter, make sure those areas are accessible before the appointment begins.
You should also point out any unusual HVAC access issues that may not be obvious when the crew arrives.
The amount of time required depends on system size, layout, access, and the work included. Homeowners who want to understand that part separately can read about how long air duct cleaning takes.
What Does an Air Duct Cleaning Machine Actually Do?
The main vacuum equipment creates the airflow needed to collect loosened material.
It does not perform every part of the cleaning by itself.
Agitation tools work on debris attached to duct surfaces, while the collection equipment removes the released material.
Professional equipment can be portable or truck-mounted. NADCA notes that both types can be used when they provide the control needed for the cleaning process.
The important distinction is between simply placing suction near a vent and creating a controlled system for loosening and collecting material from the ductwork.
Equipment choice also depends on system access, duct design, and the scope of the job.
Are Chemicals a Standard Part of the Air Duct Cleaning Process?
Mechanical cleaning and chemical application are not the same thing.
The basic process described here focuses on inspection, access, agitation, negative pressure, source removal, and final verification.
NADCA states that antimicrobial products should only be considered after mechanical surface cleaning and when their use is actually needed. EPA also advises consumers to understand the purpose and limitations of chemical treatments before allowing them to be applied inside an HVAC system.
That means a chemical spray should not be treated as a substitute for physically removing dust and debris.
Any separate chemical treatment should have a clearly defined purpose and scope.
How Is Air Duct Cleaning Different From Cleaning a Vent Cover?
Cleaning a vent cover deals with the surface you can see from the room.
Professional duct cleaning goes farther into the HVAC air-distribution system.
A register may be only the beginning of a branch duct that connects to larger trunk lines and ultimately to the heating and cooling equipment.
That is why how air duct cleaning works cannot be explained as simply vacuuming each vent.
The process requires access, controlled collection, agitation of removable debris, and attention to the connected parts included in the service.
A clean vent cover does not show whether the ductwork behind it has been cleaned.
Final Thoughts
The air duct cleaning process is a controlled sequence rather than a quick vacuum around the registers.
A professional job begins with inspection and system access. Vacuum equipment establishes negative pressure, agitation tools loosen material from duct surfaces, and the collection system removes that debris. Registers and included HVAC components are addressed as part of the agreed scope, access openings are closed, and the job ends with a final inspection.
Understanding these air duct cleaning steps makes it easier to know what is happening inside the HVAC system from setup through completion.
For an Aurora air duct cleaning process based on the condition and layout of your HVAC system, you can contact Steamrite about air duct cleaning and provide details about the property and system access.
FAQs
What is the professional air duct cleaning process?
The professional air duct cleaning process typically includes inspection, system access, negative-pressure setup, agitation of duct surfaces, vacuum collection of loosened debris, cleaning of included registers and HVAC components, closure of access points, and a final inspection.
What happens first during air duct cleaning?
The HVAC system should be inspected first. The technician identifies the duct layout, system components, access points, duct materials, and any conditions that affect how the cleaning will be performed.
Why is negative pressure used during duct cleaning?
Negative pressure creates controlled airflow toward the vacuum collection equipment. It helps collect particles after agitation loosens them from duct surfaces.
Are both supply and return ducts cleaned?
A whole-system approach considers both supply and return sides of the HVAC system when they are included in the cleaning scope. EPA identifies both supply and return air ducts as parts of HVAC-system cleaning.
What tools are used to clean air ducts?
Professional systems may use vacuum collection equipment along with brushes, air whips, compressed-air tools, contact vacuuming, or other agitation equipment suited to the duct material.
Do technicians need to make holes in ductwork?
Sometimes. Existing registers, grilles, end caps, and service openings may provide enough access, but additional service openings may be required for certain duct sections. Any openings made for cleaning should be properly closed afterward.
Is air duct cleaning just vacuuming the vents?
No. Vent cleaning addresses visible registers or grilles. Professional duct cleaning involves accessing the connected HVAC system, loosening debris, collecting it under controlled vacuum conditions, and checking the system after cleaning.
What happens when the cleaning is finished?
The technician checks accessible cleaned areas, confirms that registers and components have been returned to proper condition, and closes any service openings used during the work.